When paying MP2 contributions, I always recommend doing it via the Virtual Pag-IBIG website. But let’s be honest — paying via debit/credit card there costs a 1.75% convenience fee, which adds up fast if you’re putting in a large amount.
In a previous post, I shared a life hack that lets you pay MP2 via the Pag-IBIG website using a credit/debit card for just a 5-peso fee — but that only works if you already have a Virtual Pag-IBIG account.
Here’s another option: paying your MP2 contributions using your BPI account. There are two ways to do this — one that requires a Virtual Pag-IBIG account, and one that doesn’t.
The BPI app itself doesn’t have a “Pay Bills” option for Pag-IBIG, so bpiegov.com remains your best route if you’d rather skip Virtual Pag-IBIG entirely. That said, since the BPI app supports QRPh, you also have a lower-fee option similar to how it works with GoTyme — just route through Virtual Pag-IBIG’s QR code instead.
Option 1: QR Code via Virtual Pag-IBIG (Lowest Fee — ₱5)
- Confirm the payment in the BPI app. Since this goes through QRPh, the convenience fee is only ₱5 — cheaper than going through bpiegov.com directly.
- Go to the Virtual Pag-IBIG website to process your payment.
- Select GCash/Maya as the payment method, then choose QRPh as the eWallet option. This generates a QR code.
- Open your BPI app and use its QR Ph / Scan to Pay feature to scan the code (or upload the screenshot if you’re on the same device).
Option 2: bpiegov.com (No Virtual Pag-IBIG Account Needed — ₱7.5)
This is the better route if you’d rather not set up a Virtual Pag-IBIG account at all. You’ll need an online BPI account for this to work.
Step 1: Go to bpiegov.com
Head to bpiegov.com, BPI’s dedicated portal for government and biller payments.
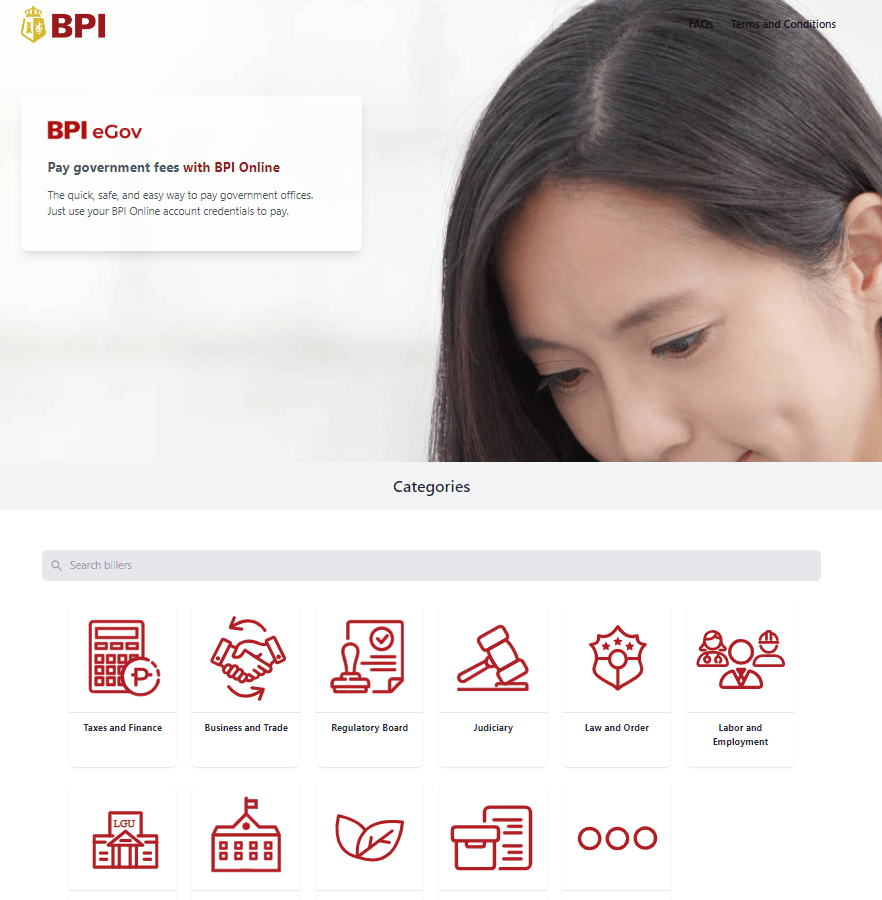
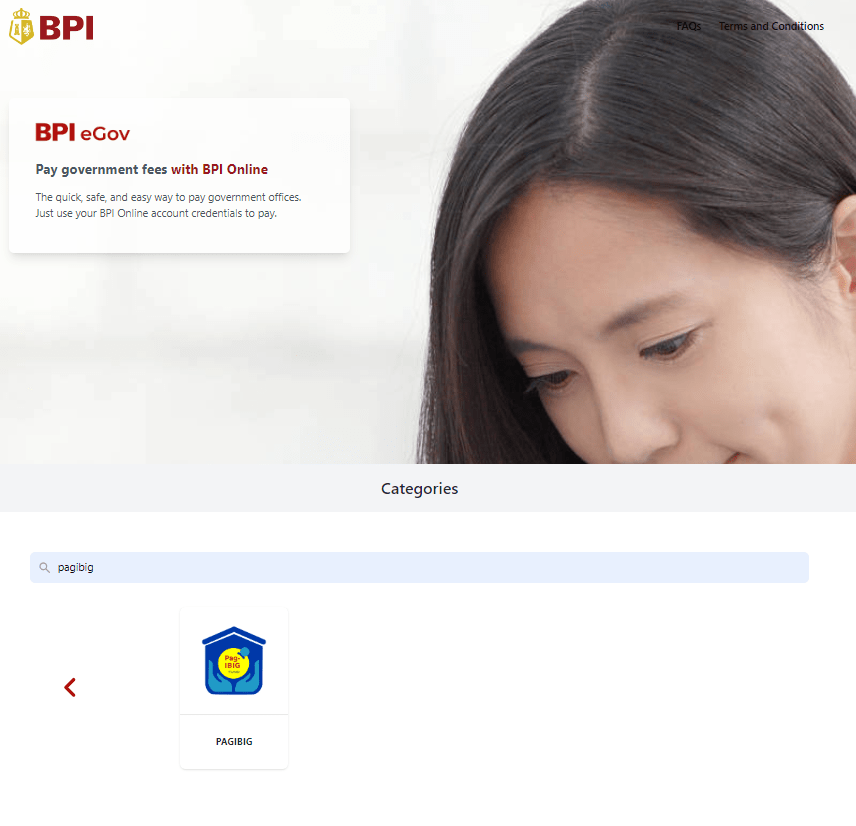
Step 2: Search for Pag-IBIG
In the search box, type “Pagibig” to bring up the Pag-IBIG biller icon. You can also browse under “Taxes and Finance” to find it in the list. Tap the Pag-IBIG biller icon to proceed.
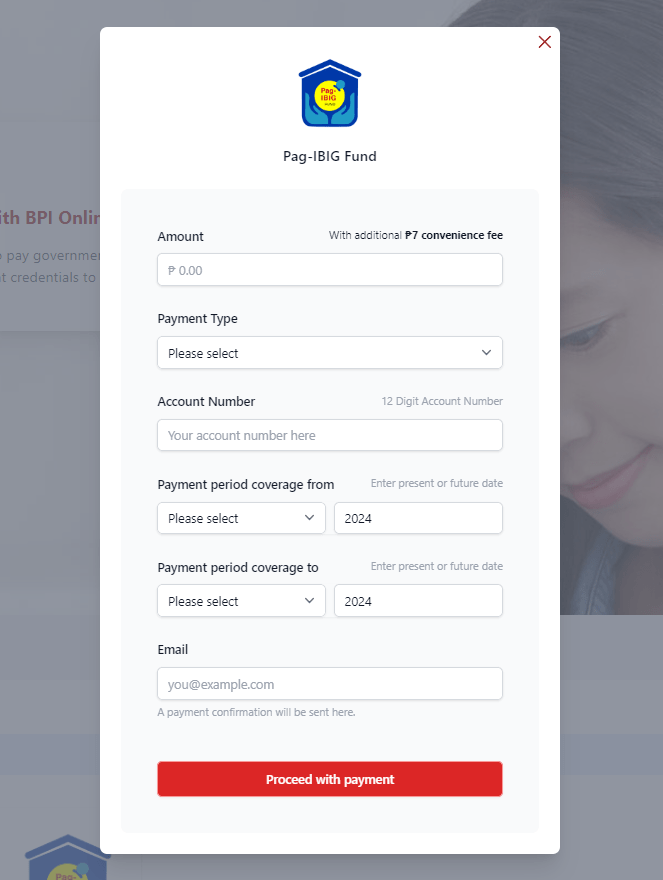
Step 3: Fill Out Your Details
You’ll need to provide:
- Amount — minimum ₱500
- Payment Type — select MP2 Savings
- Account Number — your MP2 account number (not your MID)
- Payment period coverage from/to — select the current month for both
- Email — your email address
How much can you pay in one go? This depends on the transaction limit set on your BPI account, so check that beforehand and make sure the funds are available in your account.
Step 4: Log Into Your BPI Account
You’ll be asked to log in, and BPI will send you an OTP to verify the transaction.
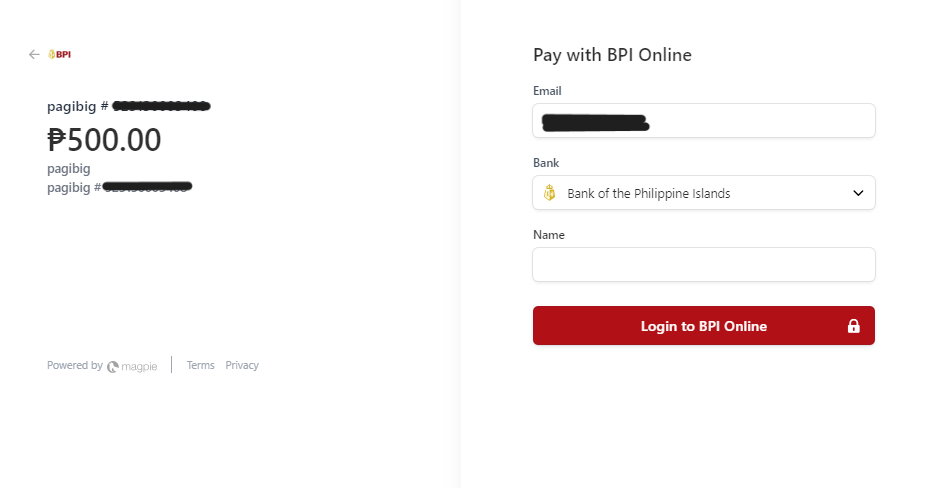
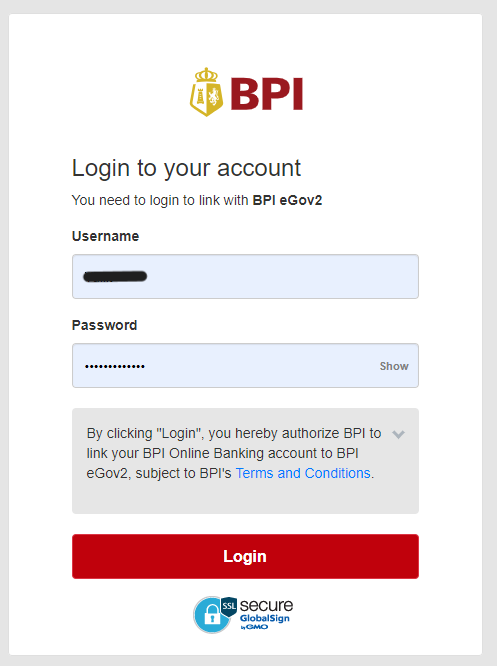
Step 5: Select the BPI Account to Pay From
Choose which BPI account the payment should be deducted from. (This step won’t appear if you only have one savings account with BPI.)
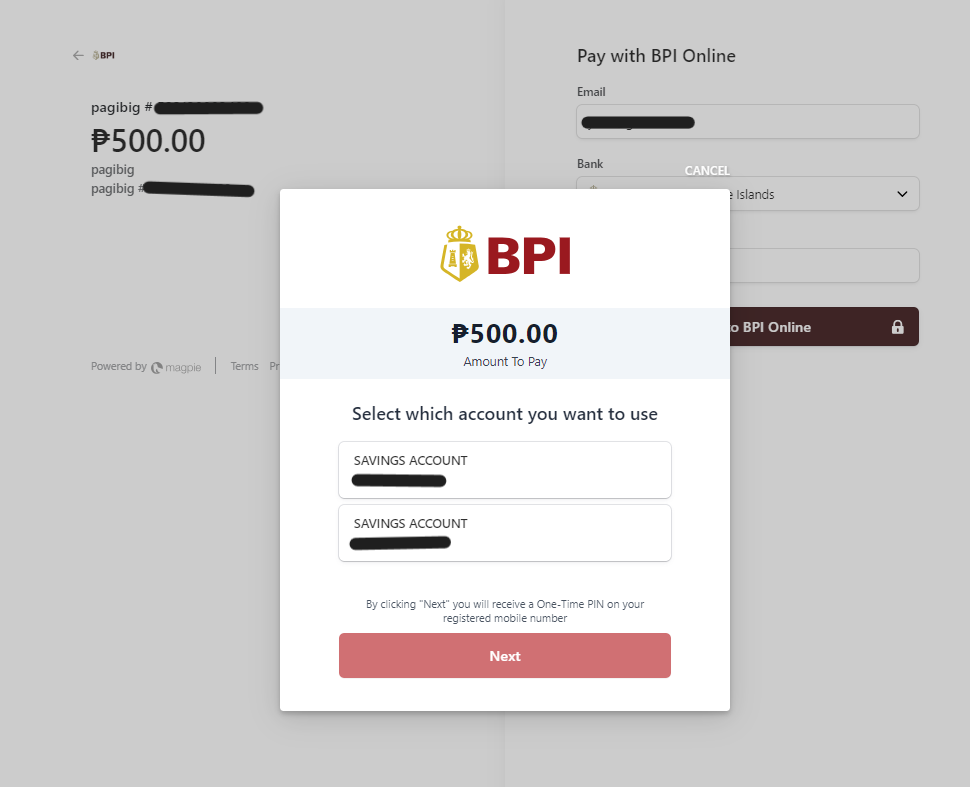
Step 6: Enter Your OTP to Complete Payment
Enter the OTP sent to your registered mobile number, then tap Pay.
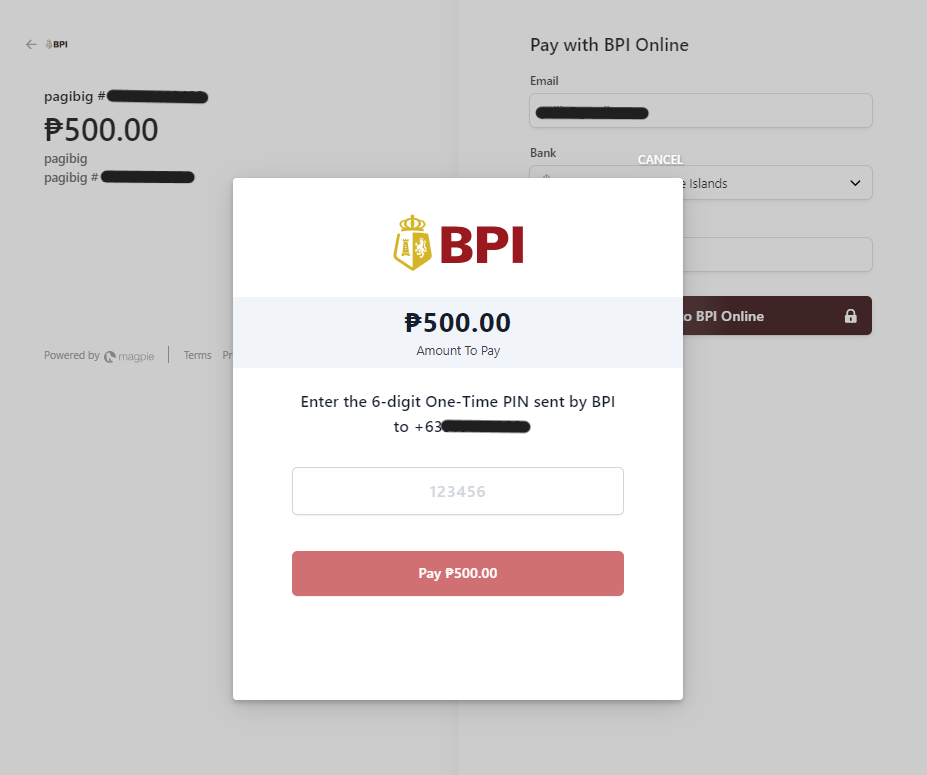
And that’s it — you’ve paid your MP2 contribution through BPI for just a ₱7.5 convenience fee.
Troubleshooting Tips
- Payment not reflecting in your MP2 account? Posting can take 1–3 business days. Keep your BPI confirmation or reference number in case you need to follow up.
- Double-check your MP2 account number before submitting. This is different from your Pag-IBIG MID — a wrong digit can misroute your payment, and recovery can take weeks.
- OTP not arriving? Make sure your registered mobile number with BPI is up to date, and check that you have signal — bpiegov.com sessions can time out while waiting.
- Can’t find the Pag-IBIG biller? Try searching “MP2” instead of “Pagibig,” or browse directly under “Taxes and Finance” if the search doesn’t return results.
- Transaction limit too low? Check your BPI account’s daily/per-transaction limit in the app before attempting a large lump-sum payment — you may need to raise it first or split the payment across two transactions.
- QR code not scanning in the BPI app? Make sure you’re using the app’s QR Ph/Scan to Pay feature specifically, not a general camera scan, and that the screenshot isn’t cropped.
Which Option Should You Use?
If you already have (or don’t mind creating) a Virtual Pag-IBIG account, Option 1 (QR code) is the cheaper route at ₱5, and it stays entirely within your BPI app once the code is generated. If you’d rather skip Virtual Pag-IBIG altogether and pay directly through a dedicated BPI portal, Option 2 (bpiegov.com) works for ₱7.5 with no extra account needed.
Either way, both options are cheaper than the standard 1.75% credit card fee on Virtual Pag-IBIG.
Related posts:
- How to Pay Pag-IBIG MP2 Contribution Using GoTyme (2026 Updated Guide)
- How to Pay Pag-IBIG MP2 Using Maya (2025 Guide)
- How to Pay Pag-IBIG MP2 Using GCash (2026 Updated + Troubleshooting Tips)
- How to Create a Pag-IBIG MP2 Account Online (Step-by-Step Guide)